
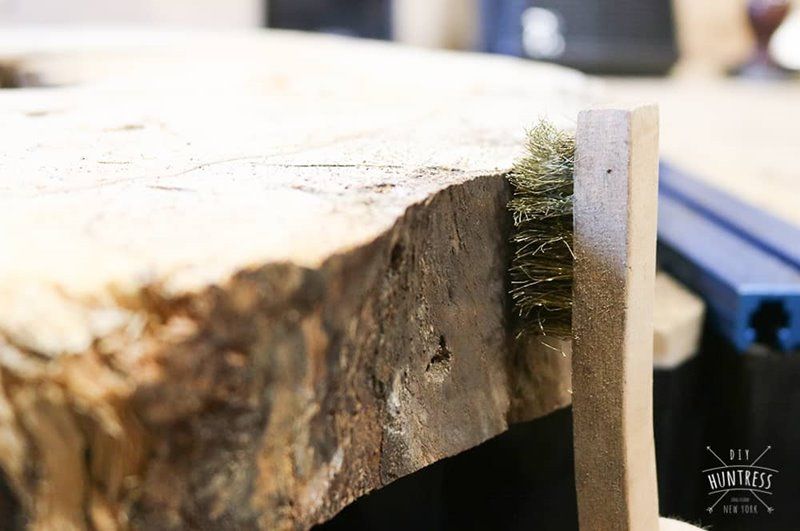
Despite the rugged beauty of the bark leaving it on the slab is going to be a fatal flaw so you need to be quite meticulous in removing it. Building the Bar Table Base 3 More Images As this is a custom build I designed the base to fit the bar top Using the compound miter saw Cut 4 table legs at 33 each from the 4X4 x 8 ft.

Diy Resin River Table In A Simple Way Resin Art Youtube Diy Resin Table Wood Resin Table Diy Resin River Table
Pour the Epoxy And Wait Add Finishing Touches.
. Be sure to remove all bark or lose wood from the edges of the slab. Sand down the wood to a gloss and seal the hole with clear epoxy. Our legs are generally metal because they offer enough strength and durability to hold up the heavy table.
Tabletop epoxy is for pours no deeper than 18. We want to provide you with step by step instructions and video that shows you the process of building a live edge river table from start to finish. These will be used to join the front and back legs.
Prepare Your Area for Epoxy. When sealing your wood before a pour you limit the introduction of air into your mixture and thus reduce the number of bubbles. The resin clear thick liquid also referred to as epoxy that was used on these live edge table projects was KraftKote resin.
I used a scrap piece of wood to make sure the legs are flush with the edge. Start with a sharp chisel and get in between the bark and sapwood. Know What Size You Want.
Once the legs are in the desired position I use a permanent marker to mark the screw holes. However for larger slabs it is better to start far away from the edge and slowly spray your way back. The process of making the live edge table consists of.
Epoxy Live Edge Table from a GIANT Frisbee River Serving Tray Watch on Setup Clean the 18 frisbee and clamp the wood cookie to the middle so it doesnt float when pouring the epoxy. There is deep pour epoxy which is intended for 2 -4 in depth depending on the project. We typically start sanding the slab using an 80 grit sandpaper.
STEP 1Choose your epoxy wisely EPOXYS are not all the same. Once Penetrating Epoxy has cured using your random orbital sander sand down all edges with 80-180 grit paper and hand sand the live edge. To learn more about this prod.
Cedar posts Cut 2 mid cross braces out of the remaining 4X4 posts at 10 516. The live edge epoxy tables that we create are customizable down to the shape of the legs we attach to the table. The first thing that needs to be done is the removal of any bark that has remained on the live edge of the slab.
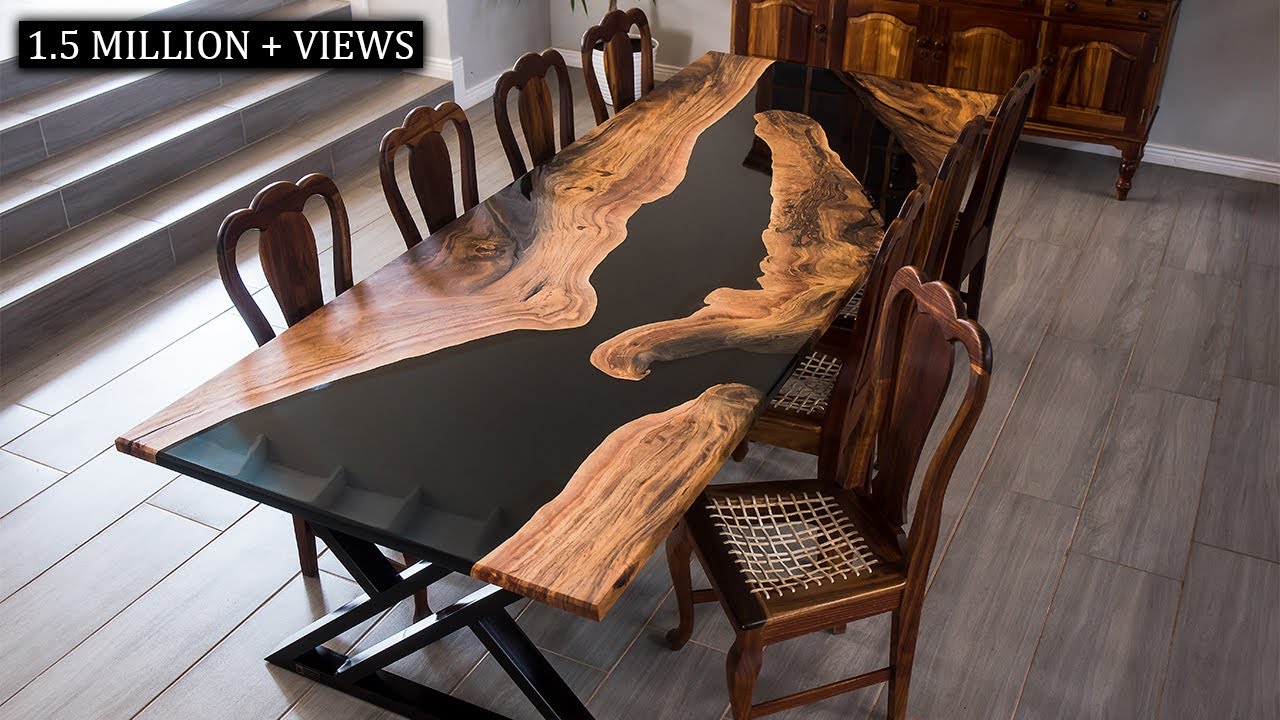
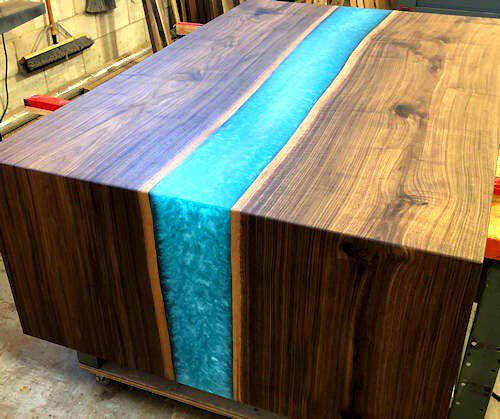
After each pass we work our way up to a finer grit until we finish sand it with 220. The result is a table that looks like the natural geographic feature of a river running between two natural banks. I will be adding tips and tricks including things I wish I knew and things I could have done bettermore efficiently.
The bottom of the leg should line up with the side of the wood table top but not go farther. If you want to use softwood Pine Ceder Balsa make sure to encapsulate the piece of wood in at least 14 of epoxy so the wood doesnt dent. 15869 Results Live edge wood coffee tableLive edge coffee tableWood coffee tableLive edge coffee table epoxyResin coffee tableLive edge epoxy table EpoxiWood 8 47000 FREE shipping Wooden Acacia Solid Natural Epoxy Top Table Handmade Hallway Area Decorative Furniture VibrantHandCreations 32550 46500 30 off FREE shipping.
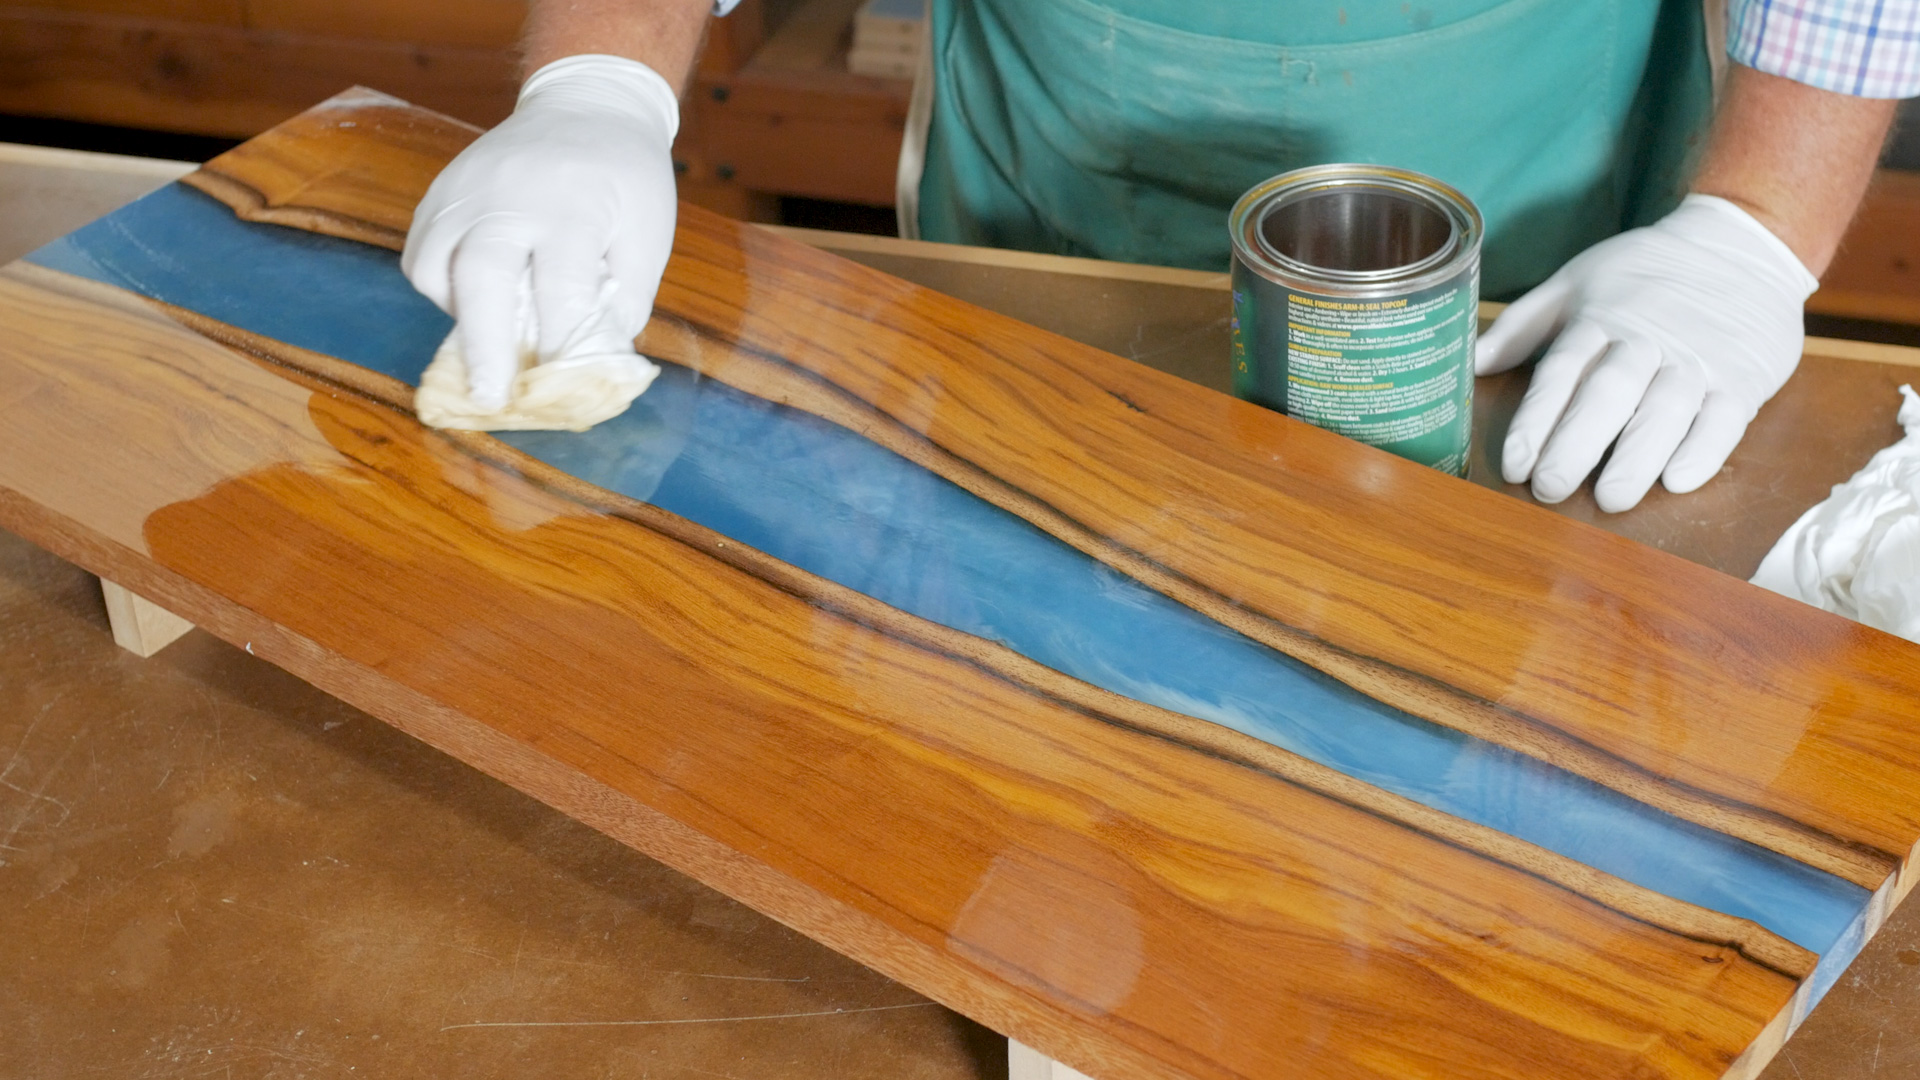
This is an important step as it will help the epoxy bond to the slab. I used Varathanes Super Glaze In Classic Gray and I love how easy it was to use. Create a Mold This step is essential to the finished result.
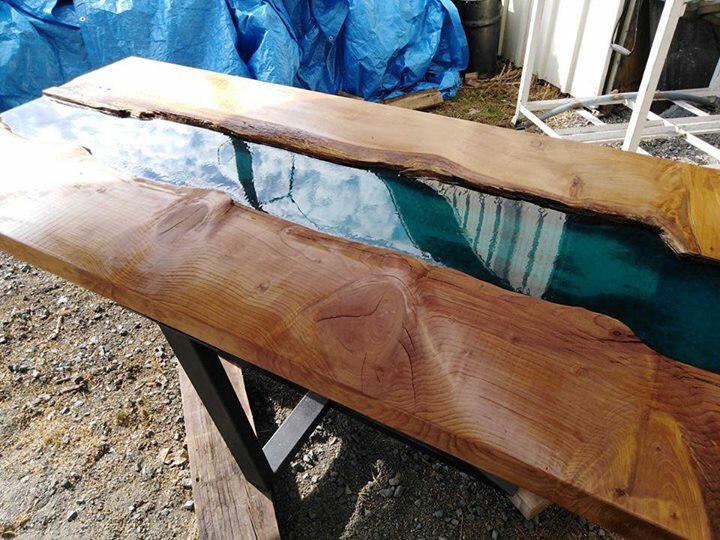
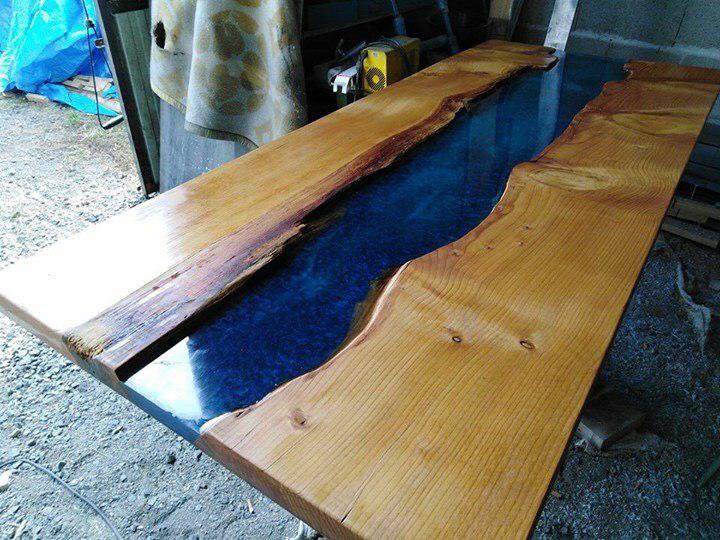
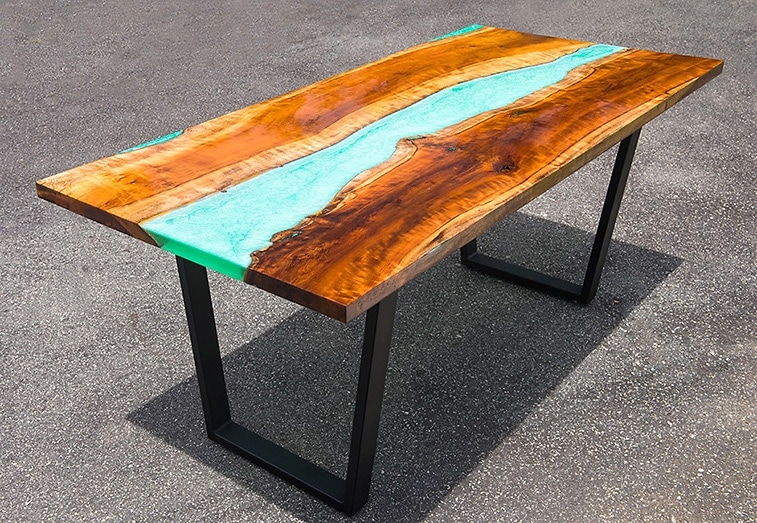
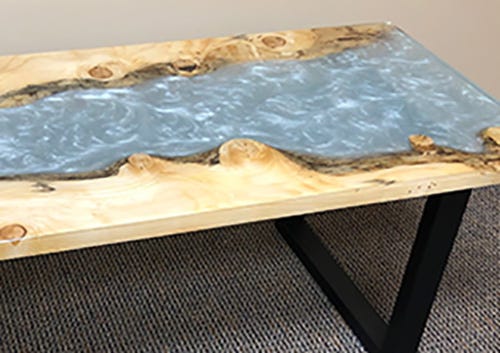
Secondly when adding 1-2 coats of epoxy on your wood or Live Edge you will stabilize it and reduce any wood movements. Main focus of this should be making sure the top side and bottom are flat and the live edge is lightly scuffed. Turn the natural edges so that they face each other then join the slabs with a blue-tinted epoxy strip.
Mixing the Epoxy After getting the mold ready to go you can start to mix the epoxy. It is also important to watch for any overspray and make sure that your finish is going on evenly. For the very last step I hit the slab with 3 coats of finish and then left it off the gas for 2-3 days.
Make sure all sanding debris is removed from wood slab prior to placing in to your mold.

How To Make An Epoxy Resin River Table Lancaster Live Edge
How To Make A Resin And Wood River Table Live Edge Resinpro Creativity At Your Service
How To Make An Epoxy River Table And Mold Mas Epoxies

How To Make An Epoxy Ocean Table Full Guide Glow Table Epoxy Resin Table Resin Table

Dining Table With Resin And Live Edge Made Of Suar Wood Etsy Polska Wood Resin Table Resin Table Big Dining Table
How To Make A Resin And Wood River Table Live Edge Resinpro Creativity At Your Service
How To Make An Epoxy River Table And Mold Mas Epoxies
Online Seminar Live Edge Epoxy River Table The Woodsmith Store

Epoxy Table Wooden Resin Table Top Blue River Epoxy Table Etsy Blue Dining Tables Resin Table Resin Table Top
How To Make A Resin And Wood River Table Live Edge Resinpro Creativity At Your Service

Diy Epoxy Table Step By Step Guide Part 2 Youtube
Diy Live Edge Wood And Epoxy Resin Table How To Fill Voids In Wood Youtube

Pin On Timber Furniture
Epoxy River Table Tutorial Make Your Own Epoxy Resin Table
Diy Epoxy Table Step By Step Instructions Youtube

Pin On Muebles De Resina

Epoxy Table Epoxy Resin Table Resin Table Poplar Epoxy Etsy Resin Table Epoxy Resin Table Epoxy Wood Table
Live Edge Resin Table Bernzomatic
Project Live Edge River Table


